

Understanding Canadian Wall Types
June 2, 2025
How to assemble ikea kitchen cabinets
July 30, 2025
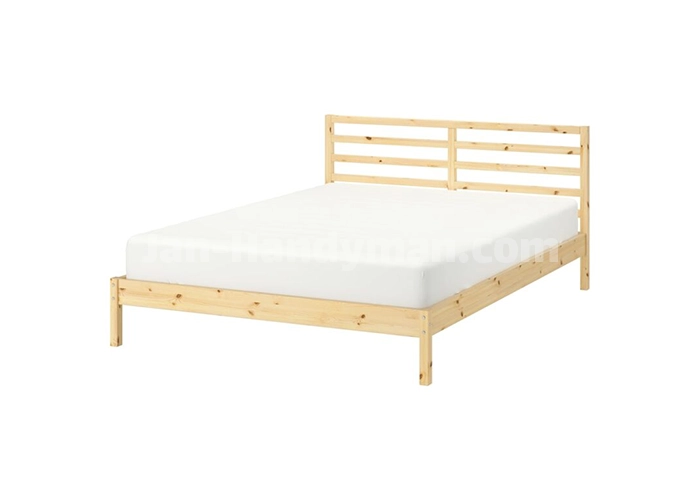
If you’re also wondering how to assemble an IKEA bed, stay with us! Start by connecting the headboard and footboard using the two side rails—this forms the main frame of the bed. Next, place the wooden slatted base securely on the side rails and the center support. Once the base is in place, all that’s left to do is lay your mattress on top, and your bed is ready to use!
Below, we’ll walk you through each step in more detail to make sure your IKEA bed is set up safely and properly.
Jan HandyMan is an expert in IKEA assembly in Toronto.
IKEA Bed Assembly Guide: Step-by-Step Instructions for Every Model
Welcome to our comprehensive IKEA bed assembly guide—your go-to resource for putting together popular models like BJÖRKSNÄS, BRIMNES, MALM, HEMNES, SONGESAND, NEIDEN, TARVA, YTTERVÅG, and IDANÄS.
Whether you’re new to IKEA furniture or a seasoned DIY enthusiast, this guide provides clear step-by-step instructions, a complete checklist of required tools, and expert tips to ensure a hassle-free assembly experience.
You’ll also find practical reminders inspired by official IKEA manuals, plus hands-on advice from our team to help you avoid common mistakes and save valuable time.
Quoted from the ikea.com :
At IKEA, we take getting a good night’s sleep seriously, with hundreds of beds to prove it! We offer an extensive array of affordable bed frames to suit all budgets, styles and preferences. Our huge selection includes platform beds, beds with storage, daybeds, loft beds, bunk beds and more in sizes for the whole family. From wooden beds with a rustic vibe to modern metal beds, we have every aesthetic covered so you can catch some z’s in style!
🧰Tools You’ll Need Before Starting
🧰 ESSENTIAL TOOLS FOR IKEA BED ASSEMBLY
Before you begin, it’s important to gather all the tools you’ll need. Having everything ready will make the process easier and faster.
- ✔️ Allen wrench (usually included)
- ✔️ Screwdriver or power drill
- ✔️ Soft mallet
- ✔️ Measuring tape
- ✔️ Clean, flat workspace free of clutter
Tip: Lay out all your tools and hardware parts in advance so you won’t lose time during assembly.
🪛 General IKEA Bed Assembly Overview
🪛 STEP-BY-STEP IKEA BED ASSEMBLY PROCESS
To guide you through the process smoothly, we’ve broken it down into simple steps.
- Prepare Your Workspace
First, clear a large, clean area where you can spread out all components.
Then, use your IKEA manual to verify that all parts and hardware are included in your package. - Sort and Identify Components
Next, group similar parts together: side rails, headboard, footboard, slats, and the SKORVA midbeam (if required).
This helps prevent errors and speeds up the process. - Follow Model-Specific Instructions
After sorting the parts, refer to the model section below for detailed steps.
You’ll find instructions for each bed type, including how and when to install the SKORVA midbeam.
Important: The mid-beam is essential for most IKEA bed frames. Make sure it’s properly aligned and securely fastened before placing the slats.

3.1. BJÖRKSNÄS Bed Frame (Queen, King)
- Frame Assembly:
- Assemble the headboard and footboard using provided screws.
- Attach the side rails to the headboard and footboard using dowels and screws.
- SKORVA Midbeam Installation by Jan Handyman:
- Slide midbeam into the slots on the side rails.
- Secure the midbeam using the provided screws or clips to prevent wobbling.
- Instruction Manual (IKEA site): Download BJÖRKSNÄS Manual
3.2. BRIMNES Bed Frame with Four Storage Drawers (Full, Queen, King)
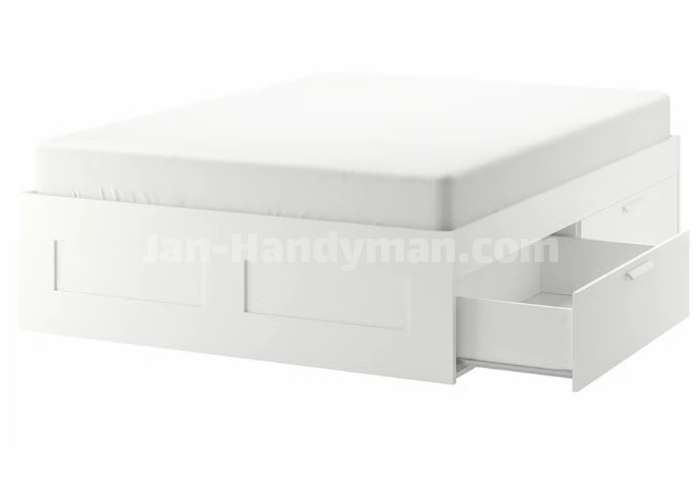
- Frame Assembly:
- Attach the headboard and footboard to the side panels.
- Assemble the storage drawers by attaching rails and brackets.
- Position the storage compartments under the frame.
- SKORVA Mid-beam Installation by Jan Handyman:
- Place JAN HANDYMAN midbeam in the designated brackets and tighten screws.
- Ensure alignment with storage components for optimal support.
- Instruction Manual: Download BRIMNES Manual (ikea website) Download BRIMNES Manual (skorva website)
3.3. BRIMNES Bed Frame with Storage and Headboard (Full, Queen, King)

- Frame and Headboard Assembly:
- Attach the headboard to the frame using screws and alignment tools.
- Secure side rails to the footboard and headboard.
- SKORVA Mid-beam Installation by Jan Handyman:
- Slide JAN HANDYMAN midbeam into the central brackets between the side rails.
- Tighten with screws to ensure stability.
- Instruction Manual: Download BRIMNES with Storage Manual(IKEA site) Download BRIMNES Manual (Skorva site)
3.4. SONGESAND Bed Frame (Twin, Full, Queen)

- Frame Assembly:
- Attach the headboard and footboard to the side panels.
- Secure all corners using screws.
- SKORVA Mid-beam Installation by Jan Handyman:
- Place SKORVA in the central slots of the side panels.
- Secure with the provided screws.
- Instruction Manual: Download SONGESAND Manual
3.5. SONGESAND Bed Frame with Two/Four Drawers (Twin, Full, Queen)

- Frame Assembly:
- Follow the SONGESAND frame steps above.
- Assemble storage drawers and attach to the frame base.
- SKORVA Midbeam Installation by Jan Handyman:
- Ensure the SKORVA midbeam aligns with the storage drawers and the frame.
- Secure it with screws or clips.
- Instruction Manual: Download SONGESAND with Drawers Manual
3.6. NEIDEN Bed Frame (Twin, Full)
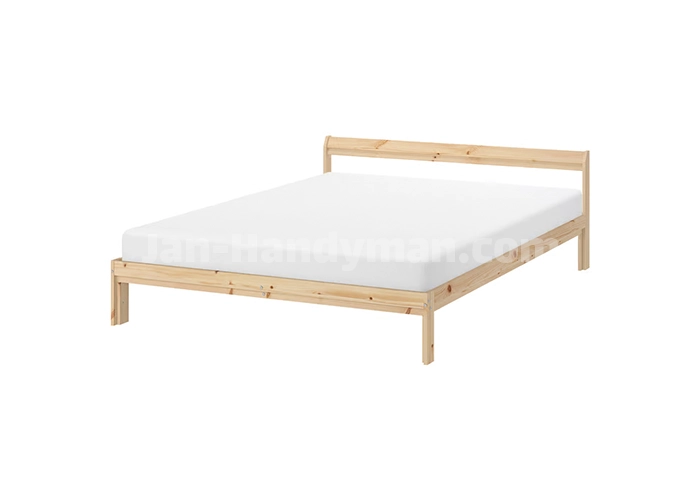
- Frame Assembly:
- Secure the simple pine side rails to the headboard and footboard.
- SKORVA Midbeam Installation by Jan Handyman:
- Slide midbeam into position and secure using the provided hardware.
- Instruction Manual: Download NEIDEN Manual(IKEA website) Download NEIDEN Manual( Skorva website)
3.7. HEMNES Bed Frame (Twin, Full, Queen, King)

- Frame Assembly:
- Assemble the solid pine side rails, headboard, and footboard.
- SKORVA Mid-beam Installation by Jan Handyman:
- Place Skorva midbeam into the central slots.
- Tighten screws to stabilize.
- Instruction Manual: Download HEMNES Manual
3.8. HEMNES Bed Frame with Four Storage Drawers (Twin, Full, Queen, King)
- Frame and Drawer Assembly:
- Attach the storage brackets to the frame.
- Assemble drawers and slide them into position.
- SKORVA Mid-beam Installation by Jan Handyman:
- Install mid-beam after ensuring storage alignment.
- Instruction Manual: Download HEMNES with Drawers Manual
3.9. MALM Bed Frame (Twin, Full, Queen, King)
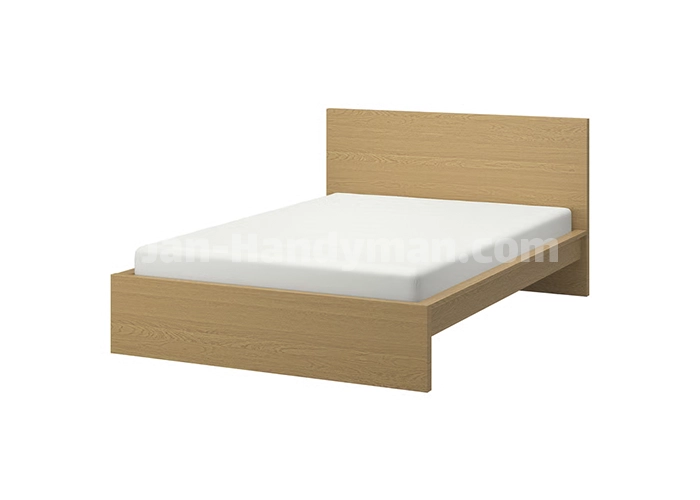
- Frame Assembly:
- Secure the veneer side rails to the headboard and footboard.
- SKORVA Mid-beam Installation by Jan Handyman:
- Slide SKORVA into the side rail brackets.
- Tighten screws.
- Instruction Manual: Download MALM Manual(IKEA website)
3.10. MALM Bed Frame with Four Storage Drawers (Twin, Full, Queen, King)
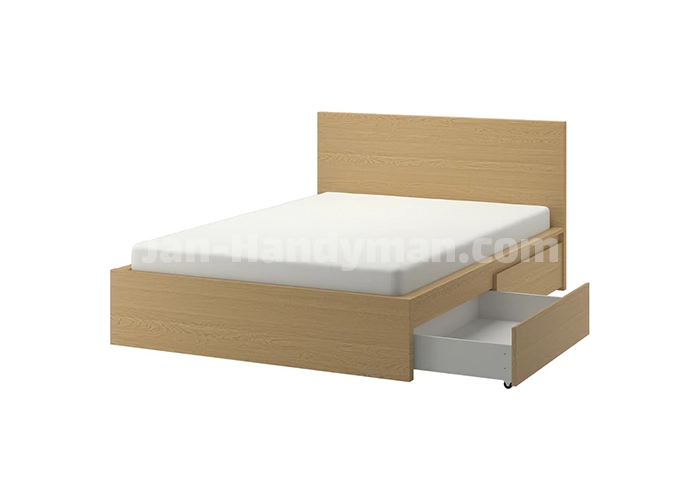
- Frame and Drawer Assembly:
- Assemble the under-bed drawers and attach them to the base.
- Align mid-beam with the storage brackets and secure.
- Instruction Manual: Download HEMNES Manual
3.11. TARVA Bed Frame (Twin, Full, Queen, King)
- Frame Assembly:
- Attach the unfinished pine side rails to the headboard and footboard.
- SKORVA Mid-beam Installation by Jan Handyman:
- Secure SKORVA using the included screws.
- Instruction Manual: Download TARVA Manual(IKEA website)
3.12. YTTERVÅG Four-Poster Bed Frame (Queen, King)

- Frame Assembly:
- Assemble the four-poster corner posts and secure to the side panels.
- SKORVA Mid-beam Installation by Jan Handyman:
- Install SKORVA in the pre-drilled slots and secure.
- Instruction Manual: Download YTTERVÅG Manual(SKORVA website)
3.13. IDANÄS Bed Frame (Twin, Full/Double, Queen, King)

- Frame Assembly:
- Assemble the frame using screws for the headboard, footboard, and rails.
- SKORVA Mid-beam Installation by Jan Handyman:
- Align SKORVA in the pre-attached brackets and secure.
- Instruction Manual: Download IDANÄS Manual( IKEA website)
3.14. IDANÄS Bed Frame with Storage (Twin, Full/Double, Queen, King)
- Frame and Storage Assembly:
- Assemble the frame and attach storage compartments.
- SKORVA Mid-beam Installation by Jan Handyman:
- Slide SKORVA into position and secure.
- Instruction Manual: Download IDANÄS with Storage Manual
- Attach the Slatted Bed Base
- Lay the LURÖY or LÖNSET slatted base over the JAN HANDYMAN beam.
- Fasten the slats to the bed frame, following the alignment instructions in the manual.
- Finalize Assembly
- Verify that all screws and components are secure.
- Attach any additional features, such as storage drawers or headboard shelves, as per your bed frame model.
Tips and Warnings:
- Tips:
-
-
- Organize all screws and parts before starting to avoid confusion.
- Enlist a second person for larger bed frames, such as King size, to ensure safety during assembly.
- Use a soft mallet to gently adjust parts into place without damaging the wood or veneer.
-
- Warnings:
-
- Avoid overtightening screws, as this can strip the threading or damage the wood.
- Ensure the midbeam is properly secured to prevent structural instability.
- Keep small parts and tools out of reach of children during assembly.
Conclusion: Congratulations on successfully assembling your IKEA bed frame! This guide is designed to make the process straightforward and stress-free. If you encounter any challenges or need further assistance, feel free to reach out to JAN HANDYMAN’s support team or CONTACT US for help. Enjoy your new bed and a good night’s sleep
written by: jan (Hamid) tavakoli
builder of Jan Handyman