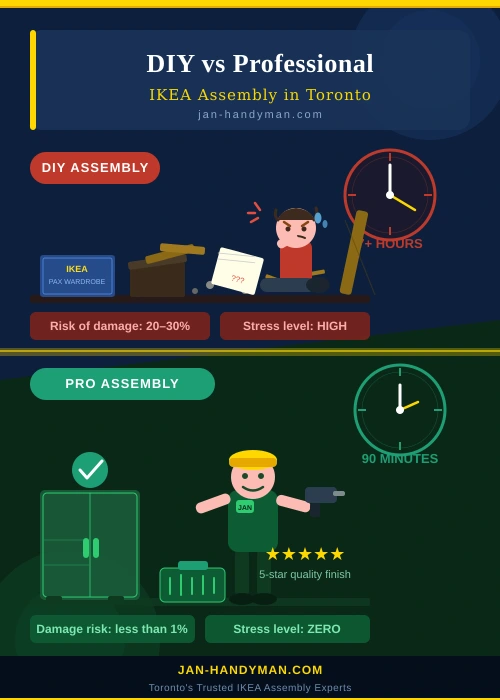

DIY vs Professional IKEA Assembly Toronto
May 11, 2026
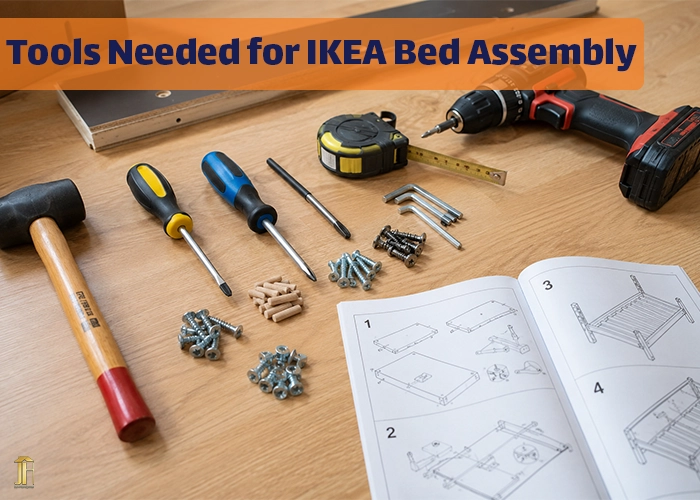
Tools Needed for IKEA Bed Assembly: A Complete Guide Before You Start
June 5, 2026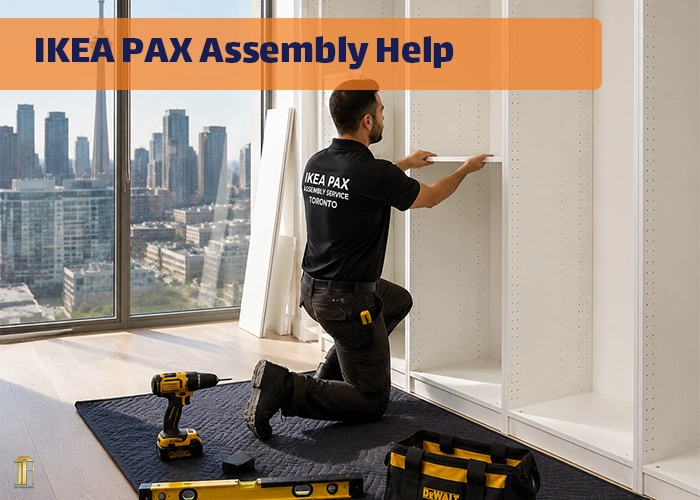
The IKEA PAX wardrobe system is one of the most popular storage solutions in the world. It offers flexibility, modern design, and customizable layouts that fit everything from small condo bedrooms to large walk-in closets. But there is one reality many people discover the moment they open the box:
Assembling a PAX wardrobe can be surprisingly difficult.
Large panels, heavy frames, precise alignment, and wall anchoring make the PAX system one of IKEA’s most complex furniture assemblies. A single mistake during installation can lead to crooked doors, unstable structures, or hours of rework.
For homeowners, office managers, property managers, and interior designers in Toronto, searching for IKEA PAX assembly help has become increasingly common. Busy lifestyles, limited tools, and tight condo spaces make DIY installation challenging.
In this guide, we will explain:
- Why IKEA PAX assembly is challenging
- How to assemble it properly
- When professional help becomes the smarter choice
- How a trusted handyman in Toronto can save you time and frustration
Whether you’re installing one wardrobe or furnishing an entire property, this guide will help you make the best decision.
Understanding the IKEA PAX System
What Makes PAX Different from Regular IKEA Furniture?
Unlike smaller furniture pieces, the PAX wardrobe system is modular and customizable. This means each installation can be different depending on the configuration you choose.
Typical PAX components include:
- Frame units (50 cm, 75 cm, or 100 cm wide)
- Hinged or sliding doors
- KOMPLEMENT interior accessories
- Shelves, drawers, and shoe racks
- Lighting and soft-close hinges
Because these components must align perfectly, even a few millimeters of misalignment can affect the entire wardrobe system.
That’s why many people search for IKEA PAX assembly help, especially when installing large wardrobes or multiple units.
Common Challenges During IKEA PAX Assembly
1. Large and Heavy Panels
PAX wardrobe frames are tall and heavy. The common height options are:
- 201 cm
- 236 cm
Handling these panels alone is difficult and often requires two or more people.
Many Toronto condo owners quickly discover they cannot safely lift and position these pieces by themselves.
2. Limited Ceiling Clearance
One of the biggest challenges in Toronto homes and condos is ceiling height.
PAX wardrobes are usually assembled on the floor and then lifted upright. But in rooms with limited clearance, lifting the wardrobe may be impossible.
Professionals often use alternative assembly techniques to avoid this problem.
3. Door Alignment Issues
Sliding doors and hinged doors require perfect alignment.
If the frame is slightly uneven:
- doors will not close properly
- sliding doors may derail
- hinges may loosen over time
This is one of the most common reasons people seek IKEA PAX assembly help after attempting DIY installation.
4. Wall Anchoring for Safety
IKEA requires tall furniture to be secured to the wall to prevent tipping hazards.
Improper anchoring can lead to:
- instability
- structural damage
- safety risks for children and pets
A professional handyman in Toronto ensures proper wall mounting based on wall type (drywall, concrete, or studs).
Step-by-Step Overview of IKEA PAX Assembly
Understanding the process helps you decide whether to DIY or hire help.
Step 1: Planning the Layout
Before opening the boxes, measure your space carefully.
Important factors include:
- ceiling height
- baseboards
- door swing clearance
- wall outlets
- ventilation space
Even a small miscalculation can prevent the wardrobe from fitting properly.
Step 2: Preparing Tools and Workspace
Basic tools required include:
- power drill
- level
- rubber mallet
- screwdriver set
- stud finder
- measuring tape
Without the right tools, assembly becomes much slower and less precise.
Step 3: Assembling the Frame
This step involves connecting:
- side panels
- top panel
- bottom panel
- back board
Precision is critical. If the frame is slightly twisted, every other component will be affected.
Step 4: Installing Interior Components
Next comes the customization stage:
- shelves
- drawers
- hanging rods
- organizers
- accessories
These must align with pre-drilled holes and remain level.
Step 5: Door Installation
This is often the most delicate step.
Sliding doors require precise rail installation, while hinged doors require perfect hinge alignment.
Many DIY installers struggle here.
Step 6: Securing the Wardrobe to the Wall
This final step ensures safety and stability.
Proper anchoring depends on wall material and structure.
When DIY IKEA PAX Assembly Becomes Frustrating
Many homeowners start assembling their wardrobe thinking it will take one or two hours.
In reality, PAX assembly can take:
- 4–6 hours for beginners
- 2–3 hours for professionals
Common DIY frustrations include:
- missing parts
- incorrect frame alignment
- doors not closing properly
- difficulty lifting large panels
- damaged components from incorrect installation
That’s why searches for IKEA PAX assembly help in Toronto continue to grow.
Professional IKEA PAX Assembly: A Smarter Solution
For many property owners, hiring a professional is the fastest and safest option.
A skilled handyman in Toronto brings experience, tools, and efficiency to the project.
This is where janhandyman becomes a valuable resource.
Trusted Handyman in Toronto for IKEA Assembly
If you need reliable IKEA PAX assembly help, jan-handyman.com provides professional furniture installation services across Toronto and the GTA.
Their experienced technicians specialize in:
- IKEA PAX wardrobe assembly
- wardrobe wall anchoring
- sliding door installation
- IKEA furniture assembly
- office and commercial furniture setup
Why Choose Jan Handyman?
- Local Toronto expertise
- Fast and reliable service
- Professional tools and techniques
- Safe and secure installation
- Experience with complex IKEA systems
For homeowners, landlords, and businesses, working with an experienced handyman in Toronto eliminates stress and ensures perfect results.
Real-World Examples of IKEA PAX Installations
Example 1: Toronto Condo Closet Upgrade
A downtown Toronto condo owner ordered a three-frame PAX wardrobe system with sliding doors.
During DIY assembly, the homeowner discovered the wardrobe could not be lifted upright due to ceiling clearance.
A technician from Jan Handyman solved the issue by assembling the frame vertically in sections and installing it directly against the wall.
The entire project was completed in under three hours.
Example 2: Airbnb Property Setup
A property manager furnishing multiple Airbnb units purchased several IKEA wardrobes.
Instead of risking installation mistakes, they hired a professional handyman in Toronto to assemble all units efficiently.
The result:
- faster setup
- perfectly aligned wardrobes
- no maintenance issues for guests
Example 3: Corporate Office Storage Solution
A tech company in North York needed multiple storage wardrobes for employee equipment.
The office manager chose professional IKEA PAX assembly help to ensure everything was installed safely and securely.
The installation was completed overnight to avoid disrupting business operations.
Why Professional Assembly Saves Time and Money
Hiring professional installers may seem like an extra expense, but it often saves money in the long run.
Benefits include:
- faster installation
- reduced risk of furniture damage
- proper wall anchoring
- perfect door alignment
- no need to purchase specialized tools
For busy homeowners and businesses, the time saved alone makes professional installation worthwhile.
FAQ: IKEA PAX Assembly Help
How long does IKEA PAX assembly take?
A single PAX wardrobe typically takes 2–3 hours for professionals and 4–6 hours for DIY installers depending on complexity.
Can I assemble a PAX wardrobe alone?
It is technically possible but not recommended. The large panels and heavy frames usually require at least two people.
Do PAX wardrobes need to be attached to the wall?
Yes. IKEA recommends securing tall wardrobes to the wall to prevent tipping and ensure stability.
What tools are required for PAX assembly?
Common tools include:
- power drill
- level
- screwdriver
- rubber mallet
- stud finder
Professional installers bring specialized tools for faster installation.
Can a handyman install sliding PAX doors?
Yes. Experienced technicians regularly install sliding door systems and ensure proper alignment.
Is professional IKEA assembly worth it?
For large wardrobes or complex setups, professional installation often saves significant time and prevents costly mistakes.
Final Thoughts: Get Reliable IKEA PAX Assembly Help in Toronto
The IKEA PAX system is an excellent storage solution, but assembling it correctly requires time, precision, and experience.
For many Toronto homeowners and businesses, the smartest approach is to get professional IKEA PAX assembly help instead of struggling with complicated instructions and heavy panels.
A skilled handyman in Toronto can transform a stressful project into a smooth and efficient installation.
Ready to Install Your IKEA PAX Wardrobe?
If you want fast, professional, and reliable help, visit jan-handyman.com today.
Our experienced technicians provide expert IKEA furniture assembly and wardrobe installation across Toronto and the GTA.
Save time, avoid frustration, and enjoy a perfectly installed wardrobe.
Book your IKEA PAX assembly service today and let the professionals handle the hard work.